Are you planning a bathroom renovation and wondering, how long does it take to tile a shower? Whether you’re tackling the project yourself or hiring a professional, knowing the estimated shower tiling timeline can help you plan efficiently. DIY shower tiling and professional tile installation involve several steps, including preparation, installation, and curing, each of which affects the overall duration.
In this guide, we’ll break down the key factors that influence how long it takes to complete a tiled shower, helping you set realistic expectations and avoid common delays.
An Estimate of How Long It Takes to Tile a Bathroom

Several factors determine the time required to install shower tiles, from the complexity of the design to the type of tiles used. Below are the primary elements that impact the tile setting process.
DIY vs. Hiring a Professional
When deciding between DIY tiling and hiring a professional, the timeline and overall efficiency can vary significantly. A skilled tile contractor can typically complete the job within 2-4 days, depending on factors such as shower size and tile type. On the other hand, if you’re a beginner attempting a DIY installation, expect the project to take around 5-7 days, as additional time will be needed for precision and learning.
Experience plays a crucial role—if you have prior tile-setting experience, you may be able to finish faster than a first-time DIYer. Additionally, using the right tools, such as a tile cutter, tile spacers, and a level, can significantly improve efficiency and help streamline the installation process.
Shower Size and Layout
The size and layout of the shower play a significant role in determining the tiling timeline. A standard shower, typically measuring 32″ x 32″ or 36″ x 36″, can take about 2-3 days to tile. However, larger or custom-shaped showers require additional cutting and adjustments, which can extend the project duration.
Built-in niches or benches also add complexity, as they require extra tiling effort and precision. Additionally, the tile pattern choice impacts the installation speed—a simple grid pattern is quicker to install compared to intricate designs like herringbone or diagonal layouts, which demand more time and accuracy.
Tile Type and Size
The type and size of the tiles significantly affect the installation timeline. Large tiles, such as 12×24 inches, cover more surface area with fewer pieces, making the process faster. In contrast, small mosaic tiles require more precision due to the increased number of grout lines, which adds to the installation time.
Natural stone tiles add another layer of complexity, as they need to be sealed before installation, extending the project further. Glass tiles, on the other hand, require extra care when cutting and setting to prevent breakage, making them more time-consuming to install.
Surface Preparation
Proper surface preparation is essential for a successful tile installation. If the shower walls require backer board installation or waterproofing, this can add an extra 1-2 days before tiling can begin. Any necessary demolition or repair work may further extend the timeline.
The condition of the substrate also plays a crucial role—if the walls are uneven, additional leveling work will be needed, increasing preparation time. Additionally, waterproofing the shower walls with a membrane or waterproof board requires at least a day to dry properly before tile installation can proceed.
Curing and Drying Time
Curing and drying time is a crucial part of the tiling process to ensure durability and longevity. After applying the thin-set mortar, it requires at least 24 hours to dry before grouting can begin. Once the grout is applied, it typically needs another 24-48 hours to dry before sealing. If sealing is necessary, this adds another 24 hours before the shower can be used.
Additionally, if epoxy grout is used instead of traditional cement-based grout, the curing time may be even longer, requiring extra patience before the shower is fully ready for use.
Step-by-Step Breakdown of the Tiling Process
Day 1: Preparation
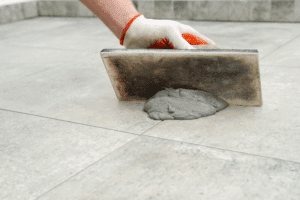
- Remove old tiles (if applicable)
- Install backer board and waterproofing membrane
- Plan tile layout
- Gather necessary tools and materials
Days 2-3: Tile Installation
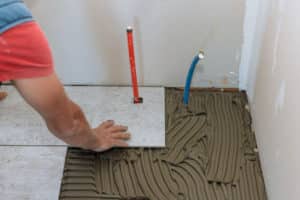
- Apply thin-set mortar and set tiles
- Allow shower tiles to dry for 24 hours
- Check tile alignment and make any necessary adjustments
Day 4: Grouting
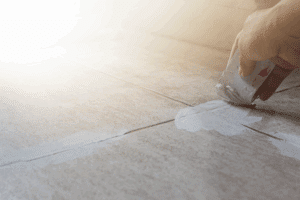
- Apply grout between tiles
- Wipe off excess grout and let it dry
- Clean up tile surfaces and smooth grout lines
Day 5-6: Sealing and Final Touches
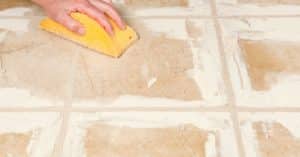
- Seal grout (if required)
- Clean tiles and allow final curing
- Inspect the tile installation for any touch-ups
How to Speed Up the Tiling Process
- Pre-cut tiles before installation for efficiency.
- Use a tile leveling system to ensure even placement and reduce adjustments.
- Work in sections instead of rushing through the whole area.
- Allow proper drying time to prevent issues like cracked grout.
- Have all tools and materials ready before starting to minimize delays.
Common Challenges That Can Slow Down the Process
Even with proper planning, unexpected challenges can arise that may delay the shower tiling process. Here are some common issues and how to handle them:
Unexpected Wall Damage
If removing old shower tiles reveals water damage or mold, additional repairs will be needed before you can begin tile setting. This can add 1-3 extra days depending on the severity of the issue.
Inaccurate Tile Cutting
Improper tile measurements can lead to wasted materials and more time spent adjusting the layout. Always double-check your tile cuts before making them.
Adhesive or Mortar Drying Too Fast or Too Slow
If working in a humid environment, thin-set mortar may take longer to dry. Conversely, in dry or hot conditions, it might set too quickly, making it harder to work with.
Grout Issues
Applying grout too soon or failing to clean excess grout properly can result in a messy finish that takes longer to fix. Always allow shower tiles to set properly before grouting.
Running Out of Materials
Ensure you have extra tiles, grout, and adhesive before starting to avoid mid-project supply runs.
So, How Long Does It Take to Tile a Shower?
On average, a professional tile contractor can complete the job in 2-4 days, while a DIY shower tiling project may take 5-7 days or longer. Factors like shower size, tile type, waterproofing, and grout drying time play a significant role in determining the timeline. By understanding these steps and planning accordingly, you can ensure a smooth tile installation process and a beautiful, long-lasting shower design.
