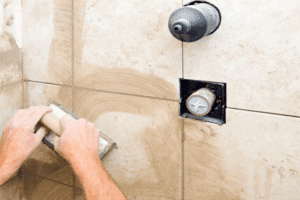
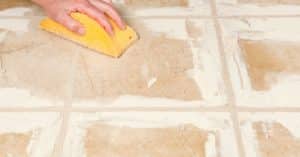
If you’ve ever noticed water stains or mildew forming on your shower tiles or grout, you’re not alone. Sealing your shower tile and grout is a simple yet crucial step to protect your bathroom from moisture damage, mold, and mildew. But how exactly do you seal shower tile and grout to keep your bathroom looking fresh and clean?
In this post, we’ll walk you through the entire process to ensure your shower stays spotless and protected for years to come.
Why Sealing Shower Tile and Grout Is Important
Sealing your shower tile and grout isn’t just about keeping it looking nice—it’s about maintaining the integrity of your bathroom. Without a proper seal, grout can absorb water, leading to discoloration, mold, and even structural damage. A good sealant creates a barrier that prevents moisture from seeping in, ensuring your grout stays clean and your tiles remain undamaged. This makes bathroom grout sealing one of the most important steps in long-term bathroom care.
Step-by-Step Guide on How to Seal Shower Tile and Grout

1. Clean Your Tiles and Grout Thoroughly
Before you can seal your shower tile and grout, you need to make sure the surfaces are clean. Dirt, soap scum, and mildew can interfere with the effectiveness of the sealant. Use a tile and grout cleaner to scrub the surfaces, ensuring all buildup is removed. For tougher stains, consider using a grout brush or a toothbrush to get into the crevices.
2. Choose the Right Sealant
There are two main types of grout sealers: penetrating sealers and surface sealers. Penetrating sealers absorb into the grout to protect it from water and stains without altering the appearance, while surface sealers form a protective layer over the grout. Choose a sealer that best suits your needs and the type of grout you have. If you’re unsure, most professionals recommend starting with a simple guide on how to seal shower grout for best results.
3. Apply the Sealant
Once your tiles and grout are clean and dry, it’s time to apply the sealant. Use a small paintbrush or applicator to carefully apply the sealer to the grout lines. Be sure to apply an even coat, avoiding excess sealer on the tiles. Follow the manufacturer’s instructions on how long to let the sealer sit before wiping off any excess.
4. Let It Dry and Cure
After applying the sealer, allow it to dry completely before using your shower. Depending on the type of sealer, it may take several hours to fully cure. Avoid contact with water during this time to ensure the sealant bonds properly to the grout.
5. Regular Maintenance and Reapplication
One of the most common questions when it comes to sealing is how often it should be done. If your shower is used frequently, you may need to reseal it every 6 months. For less-used showers, a once-a-year sealing might be enough.
A simple test to check if your grout is still sealed is to sprinkle a little water on the grout—if the water beads up, the grout is sealed. If it soaks in, it’s time to reseal. Adding these steps into your regular cleaning routine and following simple shower maintenance tips can save you time and prevent costly repairs later
Common Mistakes to Avoid When Sealing Shower Tile and Grout

1. Not Cleaning Thoroughly First
Skipping the cleaning step before applying the sealer can cause the sealer to trap dirt, soap scum, or mold, which could lead to stains or discoloration over time.
2. Over-applying the Sealant
More is not always better. Applying too much sealant can cause it to pool or leave an unsightly residue on the surface of the tiles.
3. Using the Wrong Type of Sealant
Not all sealants are the same. Make sure to choose the right sealant for your specific grout type—whether it’s epoxy, cement-based, or urethane grout.
Conclusion
It pays to understand how to seal shower tile and grout—a simple yet crucial task to maintain a clean and durable bathroom. By following the right steps, you can ensure that your tiles stay protected from moisture and stains.
However, if you’re unsure or prefer professional help, reaching out to a tile installer can provide you with the expertise needed for a flawless finish. Whether you’re tackling the job yourself or seeking help from a professional, regular maintenance will keep your shower looking great and your grout in top condition for years to come.

