When it comes to bathroom renovations in Birmingham, understanding how to waterproof a shower before tiling is critical yet overlooked. Too often, homeowners rush through or skip this process, only to discover leaks, mold, or structural issues later on. The reality? Beautiful tile alone won’t keep moisture out if water is silently seeping behind it.
If you’re in Birmingham, AL, and want to protect your investment and avoid future headaches, this step-by-step guide will show you exactly how to waterproof your shower before tiling.
Why Waterproofing Matters
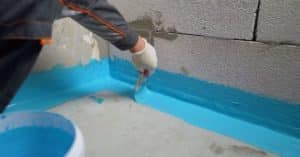
In a city like Birmingham, where humid weather can add to indoor moisture issues, proper waterproofing is a must. Water can penetrate grout lines, tile joints, or even tiny cracks, especially in high-use areas like showers. Without a moisture barrier, your home could face:
- Mold and mildew growth
- Soft or crumbling backer board
- Rotted wood and framing
- Expensive repairs down the line
Waterproofing helps you prevent those problems and adds years of durability to your bathroom.
What You’ll Need to Waterproof a Shower in Birmingham
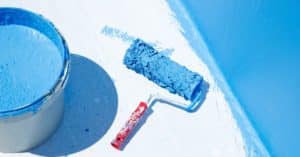
Before you start your project, make sure you’ve got the right tools and materials. Many Birmingham hardware stores like Home Depot, Lowe’s, or local suppliers like Birmingham Fastener carry these items.
Tools & Materials Checklist:
- Cement board or waterproof foam backer board (avoid drywall)
- Waterproof membrane (liquid or sheet type)
- Waterproof mesh tape or corner sealing fabric
- Thin-set mortar (for applying sheet membranes)
- Paint roller or brush (for liquid membranes)
- Silicone or polyurethane caulk
- Utility knife and notched trowel
- Mixing bucket
- Drain plug (for flood test)
- Gloves and safety glasses
Local tip: Stick to one brand for all waterproofing products (e.g., RedGard or Schluter) to ensure compatibility.
Prepping Your Birmingham Shower for Waterproofing
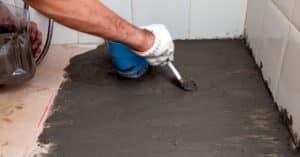
Here’s how to prep your shower area before applying any membrane:
1. Install the Right Substrate
Use cement board or a waterproof foam board — both are available in Birmingham stores. Skip the drywall; it’s not made for wet areas and will eventually fail.
2. Secure the Boards Properly
Use corrosion-resistant screws and leave a small 1/8” gap between boards to allow room for sealant and expansion.
3. Seal Seams and Corners
Apply waterproof mesh tape or fabric to all seams and corners using thin-set mortar. Don’t skip this, most leaks begin here.
4. Prep Around Fixtures
Ensure all plumbing and fixtures are securely installed. Use silicone caulk around edges and penetrations to prevent leaks.
5. Clean the Surface
Wipe down walls and floors to remove dust and debris before applying waterproofing material.
Choosing the Right Waterproofing System for Your Home
There are several waterproofing methods, each with its pros and cons. Choose the one that suits your needs, experience level, and budget.
Different products work better depending on your experience and needs. Here are your options:
Sheet Membranes
Brands like Schluter®-KERDI and RedGard® Fabric Membrane provide a solid, consistent moisture barrier. They’re great for long-term durability.
Liquid Membranes
Paint-on or roll-on products (e.g., RedGard, Hydro Ban) form a rubber-like seal when dry. Ideal for DIYers in Birmingham, tackling weekend projects.
Foam Backer Boards
Products like Wedi® or Kerdi-Board combine tile backing and waterproofing in one, perfect for cutting down installation time.
Step-by-Step: How to Waterproof a Shower Before Tiling
Step 1: Prepare the Surface
Ensure walls are clean, dry, and structurally sound.
Step 2: Seal All Joints and Corners
Use mesh tape or fabric with thin-set mortar or adhesive over seams and edges.
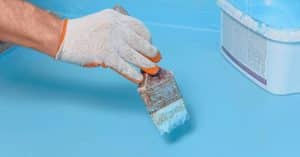
Step 3: Apply the Waterproofing
- Sheet Membranes: Cut to fit, apply with thin-set, and overlap seams by 2 inches.
- Liquid Membranes: Apply two coats with a brush or roller, allowing proper drying between coats.
Step 4: Inspect and Patch
Check for bubbles or missed areas and reapply if needed.
Step 5: Flood Test (Optional but Smart)
Plug the drain, fill the shower base with water, and let it sit for 24 hours to check for leaks — highly recommended in humid areas like Birmingham.
Common Waterproofing Mistakes to Avoid
Avoid these common waterproofing pitfalls:
- Skipping waterproofing altogether
- Not letting the membrane cure properly
- Leaving gaps in corners or around fixtures
- Using drywall instead of cement board
- Tiling before waterproofing is fully dry
Even small shortcuts can lead to big problems down the line. Take your time, follow product instructions, and double-check every step.
After Waterproofing: Ready for Tiling
Once your waterproofing membrane is fully applied and cured, you’re ready to begin tiling.
Here’s what to do next:
- Double-check for full coverage. Any missed spots should be patched before continuing.
- Use a compatible thin-set mortar. Some membranes require unmodified mortar, while others accept modified mortar.
- Start tiling from the bottom up. This helps with alignment and support.
- Avoid puncturing the membrane. Don’t drill or screw into the waterproofed surface after it’s sealed.
- Let your tile adhesive dry fully before grouting.
A properly waterproofed shower will not only extend the life of your bathroom, but it also gives you peace of mind knowing it’s built to last.
Conclusion
Learning how to waterproof a shower before tiling is one of the most valuable things you can do for your home’s longevity. Whether you’re tackling a DIY project or preparing to hire a contractor, understanding this process helps ensure the job is done right the first time.
If you’re unsure about the best method for your specific setup, consult with a professional or refer to the manufacturer’s installation guides. A little effort now can save you thousands in future repairs.
