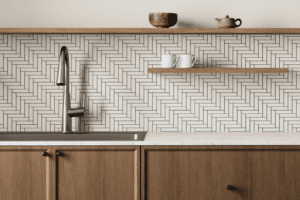
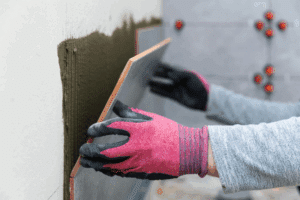
Proper backsplash installation can greatly improve the kitchen’s appearance and usability when remodeling the space. Birmingham homeowners, however, may struggle with finding the ideal fit that works with their space and lifestyle; most can certainly use kitchen backsplash installation tips to help them realize their vision. After all, integrating a backsplash into your current kitchen plan is a complex task that calls for skill and keen attention to detail, especially given the limited living spaces in the city.
That all said, here are five kitchen backsplash installation tips to help you out!
A Tile Backsplash: What Is It?
A backsplash is a type of tile wall design that is typically found in your kitchen or bathroom, or other high-heat or high-moisture areas of your house. This ornamental and practical accent keeps dampness and stains away from sensitive areas. Your tile backsplash may be installed by an experienced contractor, but you might be able to DIY it and save money.
Backsplashes are often installed below bathroom and kitchen sinks, above kitchen worktops, and behind bathroom showers. Typically composed of lightweight materials like porcelain, ceramics, metals, and glass, backsplashes can be designed in an eye-catching way by arranging them in different patterns and color combinations.
Top 5 Kitchen Backsplash Installation Tips

One of the best ways to increase the value of your house is to remodel the kitchen, but you don’t need to spend a lot of money or time on it. Installing a backsplash will help you create a stylish and functional kitchen design without blowing your budget. The work mostly involves tiling the wall behind your sink—it just requires a weekend and can be done for a few bucks per foot. What’s more is that there are endless styling options, and the task may be completed without relocating appliances or cabinets.
Now, if you’re looking to upgrade your kitchen with a nice backsplash, here are some tips that you can use:
Tip #1: Mix and Match the Tiles
If you’re installing a backsplash for your kitchen, think about how various components like countertops and appliances go together. Solid countertops complement sophisticated or vibrant backsplashes the best.
In spaces where the countertop lacks much detail, a combination of metal and glass tiles might draw attention. These tiles sometimes come in 12-square-inch interlocking sheets, which can practically simplify the installation process.
Tip #2: Prepare Your Backsplash Layout In Advance
To prevent awkward cuts, thoroughly plan your layout before installing your backsplash. You don’t want to finish the work only to find an annoying, awkwardly cut sliver that does not work well with the sink or the cabinets.
Start by holding the tiles up against the wall and carefully moving them up in the design you want. To ensure that at least a quarter-tile fits on top, you might need to start with a half-tile at the bottom. Alternatively, you can go with the so-called “1/3 rule,” especially if you’re working with large or slightly warped tiles. This involves cutting a tile by a third of its length, creating a more even pattern and a brick- or stone-wall-like finish.
Tip #3: Use Accent Tiles to Bring In Emphasis to Your Tile Backsplash
If your backsplash is constructed of cheap tiles, use more expensive glass or handcrafted ceramic tiles as accents. You don’t have to spend a fortune on a full high-end finish to achieve an opulent, memorable design.
As an example, solid-colored tiles will look great with a complementary 6×6-inch ceramic tile with flower motifs. With its complex pattern and colorful accents, it will cost more than a regular tile. Thankfully, you don’t have to use the same pattern throughout your kitchen. All you have to do is position it strategically.
Tip #4: Use a Backsplash to Visually Expand Your Space
To create the illusion of more space in a small kitchen, consider extending the backsplash throughout the entire space. This method works especially well with tiles that have subtle designs or textures because it establishes a feeling of visual continuity. Plain white tiles could add the feeling of a bigger space, while darker ones would add an illusion of depth to your kitchen.
Glass tiles, on the other hand, can take your kitchen to a whole new level. It has a light, airy feel, and the transparency suggests there might be more beyond the kitchen counter. This is especially popular with Birmingham homeowners, and this trend is not going any time soon.
Tile patterns can also make a big difference in terms of visually expanding your kitchen space. Tiles can be arranged to create subtle optical illusions; think of perspective-skewing color gradients and spirals, among others.
Tip #5: Use the Right Type of Adhesive
Different tiles may call for different types of adhesives. For regular, opaque ceramic tiles, common gray adhesives will work. However, you need to use either white thinset or mastic when working with glass tiles. The adhesive will be visible through the glass, so it also needs to add to the visual appeal. Alternatively, you can alter the backsplash’s color profile and appearance by using colored glue. Both cases take advantage of the translucent nature of glass tiles, keeping the backsplash in place while maintaining the delicate and ethereal pattern of individual tiles intact.
How to Install a Kitchen Backsplash

You can’t just start installing your new kitchen backsplash as soon as you’ve gathered everything you need for the project. You will have to be organized in your approach to avoid wasted material, time, and labor. You can follow this basic, step-by-step installation method, for starters:
- Measure the area your backsplash needs to cover
- Based on your measurements and vision, organize the design and pattern for your tiles.
- Clear your workspace of any furniture, device, or debris.
- Cut your tiles as dictated by your chosen layout.
- Blend and apply your adhesive to the wall.
- Quickly install the first tile to get a sense of the design.
- Install the remaining tiles, but don’t take too long or the adhesive dries and becomes useless.
- Allow the tiles to set for at least 24 hours.
- Clean the cured tiles and apply grout in the seams. This is additional waterproofing that keeps moisture from seeping under your tiles.
- Keep the bottom sealed to keep water out of your tilework.
Conclusion
Certain backsplash tiles have a timeless charm and can blend with a variety of kitchen types, even when design trends come and go. While the final product is where the beauty of your tilework shines, the key remains in the accumulation of small, sensible touches that make everything work together.

